As well as working with the map, which is the most common way of working in AWM, you can also work with the individual layers in a grid environment which can be useful for looking at larger sets of data.
Finding the Grid
For each layer you add to the map, a corresponding grid is added to the left-hand side of the application: The grid itself can be accessed by clicking on that name in the left-hand menu.
Closing and Recovering the Grid
When you mouse over the grid on the left-hand side, a “x” will appear at the right-hand side of the grid name – clicking this will close the grid (but not the layer on the map). To recover the grid after you’ve closed it, click on the layer in the map, and choose the “Show Grid” option from the menu that pops up to bring the grid back up on the left-hand side:
The Grid itself
Clicking on the layer name in the left-hand menu brings up the grid:
Individual records can be selected in the grid by clicking in the small tick boxes on the left-hand side of the grid – this can be useful for quickly grabbing some records to export, but generally it’s better to use filters.
At the top is the action menu:
Key items in here are:
- Refresh – updates the current grid (can be useful to pick up changes colleagues have made while you’ve been in the grid).
- Add – you can create a record from the grid rather than the map – the process here is slightly different as the record’s shape is generated from the location and dimension data that you enter rather than deriving the location/dimension data from the shape.
- Columns – this allows you to specify the fields of the record you wish to see in the grid (generally the grid only shows a subset of the information on a record).
- Filter – you can modify the filter applied to the grid here – note that this filter is ALSO applied to the layer on the map.
- Export – useful for exporting data out of AWM to share with others who may not have access to the system.
- Settings – allows you to choose between the saved views you may have set up as described in “Customising and saving views”.
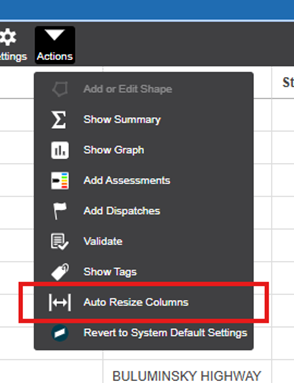
- Actions – there is one option here that is useful “Auto Resize Columns”, which will size the columns to match the headings and data in the columns, potentially getting more data on screen.

Clicking on a row in the grid will open the record for that row just as if you had clicked the show details button on the map at which point you can work with the record as described earlier in this document.
Modifying the columns visible in the grid
Click on the Columns button in the action menu at the top – this will open up a tab which lists all the columns on the table you are looking at on the grid – those ticked will show up on the grid, while columns which are lookups to other tables have a black triangle that allows you to expand to see the fields on that table and include them in the grid as well.
In the example shown below, the column “Culvert Pipe Shape” is a lookup to another table – clicking on the black triangle then shows all the available fields from that table as well as those directly held in the Major Culverts table – in this case, you could choose to include the Calculate Area From Diameter from the lookup table to the grid:
Adding a record in the grid
To add a record via the grid you will need to gather location data to populate the record with – this information can either be supplied by others with access to the system, or can get captured by using the i Tool as described in the AWM Navigation article.
Depending on the record you are trying to add, this may be simply the road name, and a route position along that road (a point asset) or may require both a start and end location.
When adding the record, the location section of the record should be loaded with this information, otherwise the record will not save, or worse, may not show on the map at all as it has no location data to map to.
Aside from this requirement to populate the location information, the process for adding the record otherwise follows that described in the AWM Working with Records article, at least from the point the record itself opens.
Exporting from the grid
To export information from the database, click on the Export button at the top of the grid – you can either export “selected” or “all items” – choosing selected items only exports those items in the grid that are ticked (see screenshot below) while all items exports all the records in the grid (based on what filters you may have set). You can either export directly to Excel (in which the file can be found in your downloads folder) or copy to the clipboard and paste into a file of your choice – Excel or otherwise. Just be careful when using the copy paste option as some large text fields which allow for line breaks (use of the Enter key in the field to form paragraphs) will cause the record to paste over multiple rows in Excel – in this case you’re better off exporting directly to Excel.
