| Article Purpose | This article defines the standard process for importing roughness data into AWM. |
| Intended Users | PNG AMB - GIS team |
| Last Reviewed | 8 April 2026 |
Import Roughness Data into AWM
This section outlines the process for importing validated Roughometer or Totalpave roughness data into the AWM Roughness Reading table.
- If you do not have the 'Citrix Workspace' software downloaded, download from https://www.citrix.com/downloads/workspace-app/.
- Launch Citrix Workspace, click Sign In. If the window asks for your Store URL, fill in with "rammnz.cloud.com". In the sign in window, type in "ramm\" then your username, and your password.
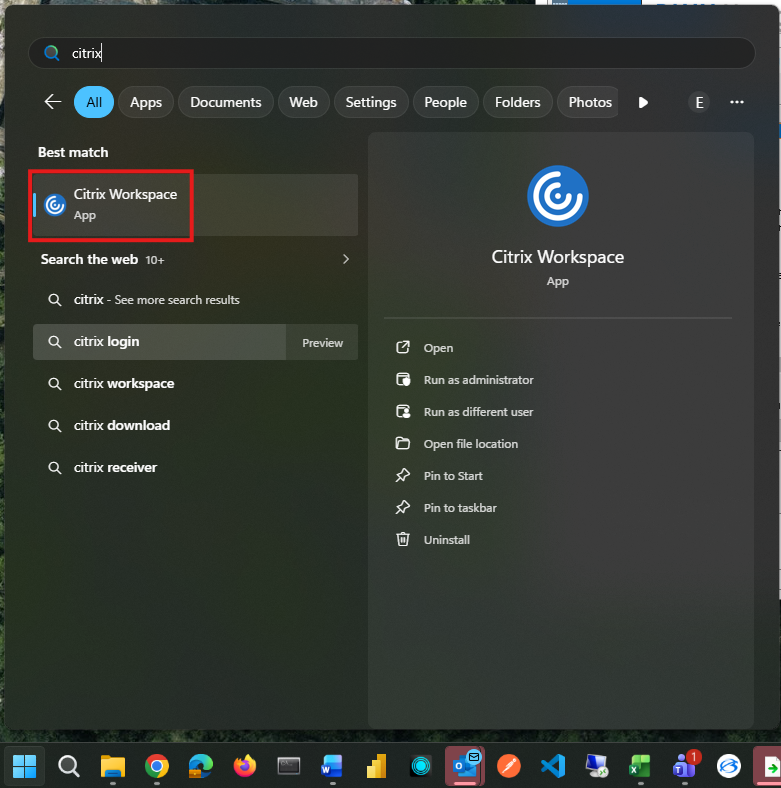 Opening the Citrix Workspace software through the start menu
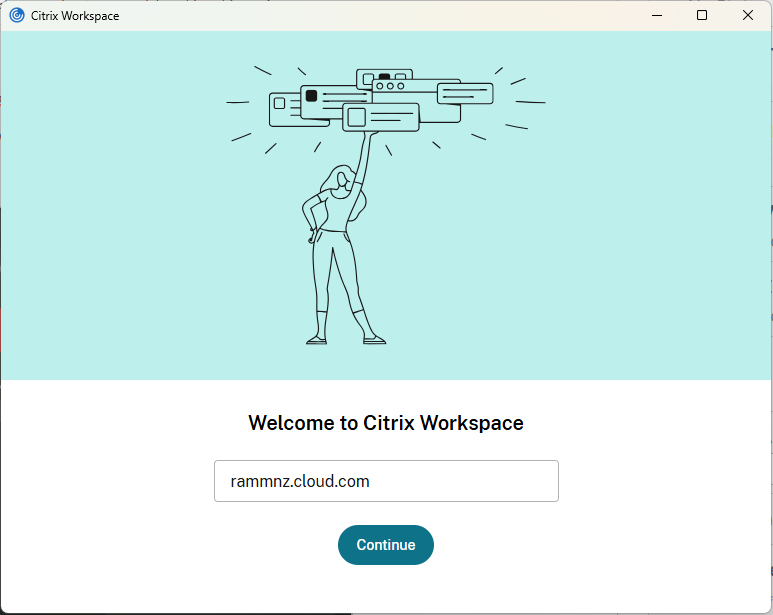 Entering the AWM "Store URL" into the Citrix Workspace window
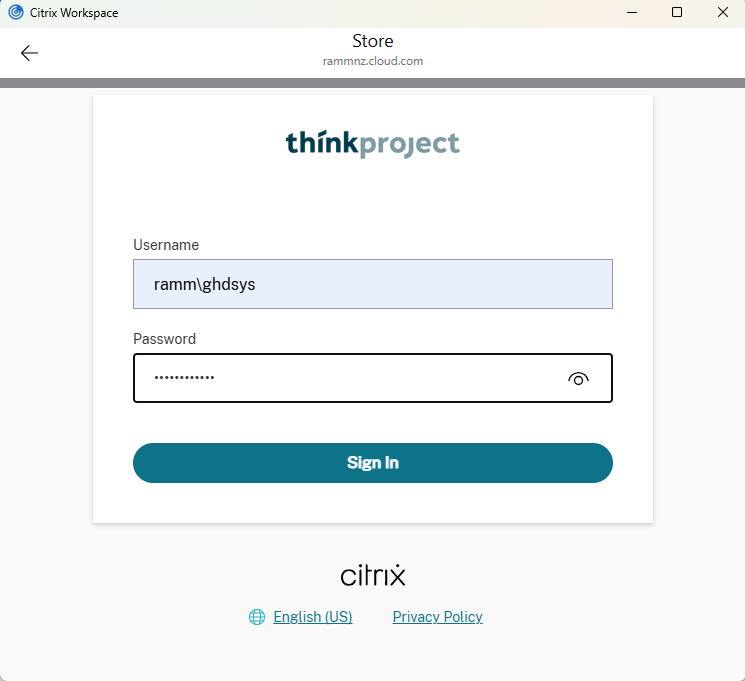 Entering the username and password in the Citrix Workspace sign in window.
 - Click to open "RAMM Manager".
 Opening RAMM Manager in the Citrix Workspace software
 - Confirm the correct database is selected (Papua New Guinea).
 Changing the database selected in RAMM Manager to Papua New Guinea
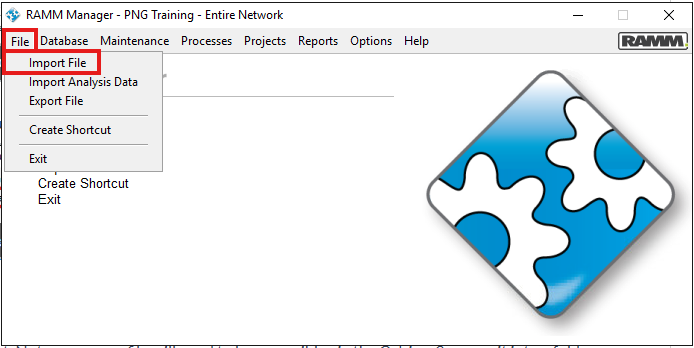
 - Go to File → Import File → Load.
 Opening the Import File window in RAMM Manager
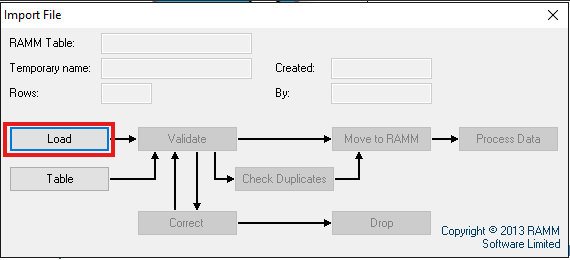 Load button in the Import File window
 - Select the model output CSV file (by clicking the ellipsis button and browsing files) and click Next. Note – your csv file will need to be accessible via the C drive. So move it into a folder accessible via C drive such as ‘temp’ (create a new folder if required).
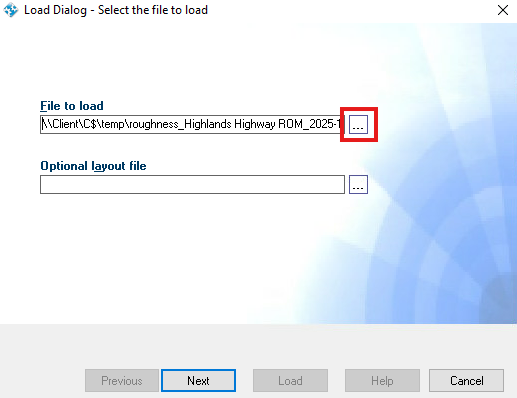 Loading the processed roughness data file in the Load dialog window
 - In the blank search bar at the top, type in "rough". Click the ‘rough’ row in the list of tables, and click Next.
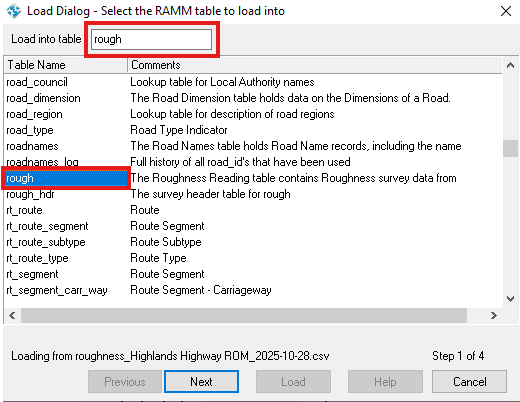 Choosing the AWM table to load the data into
 - Choose Delimiter ‘Comma’ and click Next.
- For ‘Import Data Date Format’ select DMY and click Next.
- Link fields and add default values such as ‘Latest’ under the latest field. Then select Load (it will no longer be greyed out once field mapping complete). NOTE // Each field coloured red needs to have an icon next to it – either mapped to one of the input fields or have a default value provided.
- If a field already has a chain icon or key icon next to it, it is likely you do not need to change it.
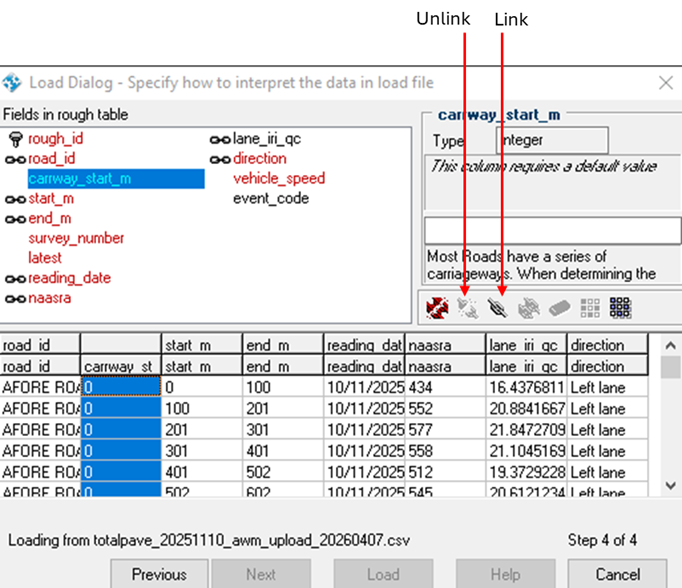 Mapping fields from the data file to fields in the AWM table
 - Select survey_number in the Fields in rough table, then select the dropdown and select an existing survey header, or create a new survey header by clicking the + button.
- For survey_number, you may need to add a survey header if it is a new survey, using the + button. The ‘Survey’ name should start with S followed by a sequential ID number (use number following the previous number), then the year of survey followed by a description which should include name of road/region (or national) and the data collection method. For example, S10 – 2025 National Totalpave Survey. The date should be the latest date in the survey period. Then select the green arrow at the top to confirm.
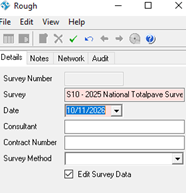 Creating a new Survey Header
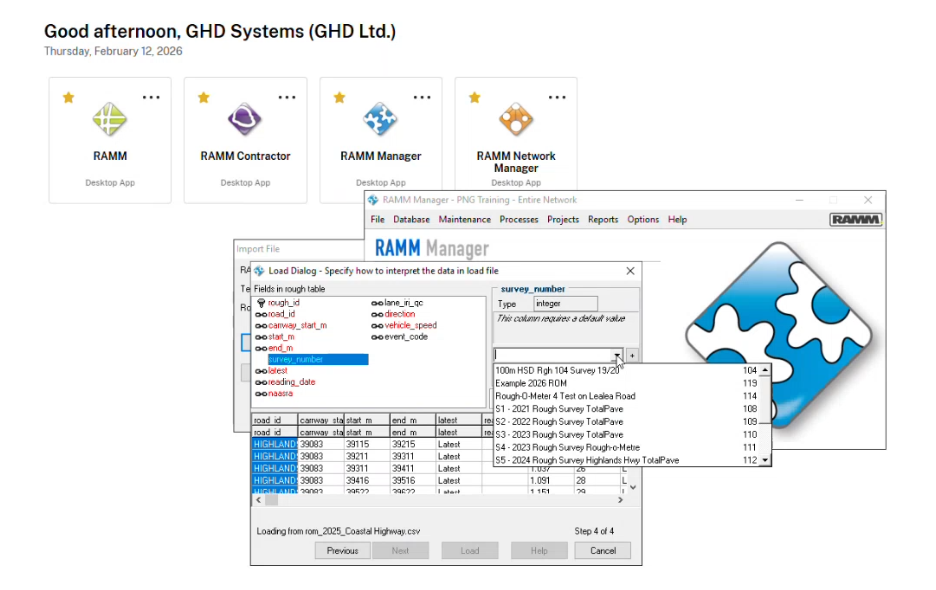 RAMM Manager showing dropdown for survey_number.
 - Once all required fields are mapped, click "Load".
- If a field already has a chain icon or key icon next to it, it is likely you do not need to change it.
- For vehicle_speed, if it is not available in the data (currently it is not included in Totalpave but is included in Rough-o-meter) enter 50 (for 50 km/h). Note// This is a default value that could be decided to be updated.
- Still on the same page, look through table and see if any columns are empty. If so, select the column and unlink it from the CSV. Then leave it blank or populate it yourself.
- If your data is historical and not the latest readings, you can select the ‘latest’ column and unlink it. Then from the dropdown select ‘Not latest’ and select link again to link it back to the column.
- Next sequentially select Next, Load, Validate, Check Duplicates and Move to RAMM. If you encounter any errors in these steps, they will need to be resolved before continuing.


Validate and Finalise Import
This section describes the final checks performed within AWM to confirm that Roughometer roughness data has been imported correctly and is visible in the Roughness Reading table.
- Open AWM and search for Roughness Reading.
- Filter the table for the survey used, by selecting the filter icon above the table. Then click Add and select Survey as the column to filter by with the value to filter for being the survey used.
- Visually check the data is now in the AWM Roughness Reading table.
 AWM Roughness Reading table after being imported.
- If this is the latest survey on this particular section of road we need all other surveys for Roughness Reading on that road to be turned to historic. To do this, click process data and then in the status check window tick Set most recent flags for Roughness Data. Then begin processing. (Screenshots of how to do this are provided below).
 Where to find the Process Data button.
 Where to find the Set most recent flags for Roughness data button.